 Today I’ve got something exciting to share…
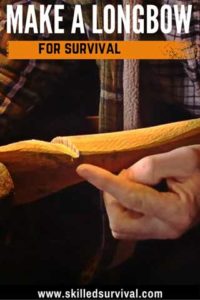
A Complete Guide On How To Make A Longbow From Scratch
Because the longbow was the most innovative invention of its day.
And whomever first created the bow had no idea they were carving out the future of humanity.
A weapon equally silent, stealthy, simple, and utterly deadly.
And you CAN build your own, IF you follow this guide…
TOPICS IN THIS GUIDE… ↓(click to jump)
- Basic Longbow Material List
- Getting Started On Your Longbow
- Learning The Art Of Tillering
- Finishing Your New Longbow
Want a free 54 item survival gear checklist?
Click here to instantly download this Complete Checklist PDF. No purchase necessary.What You Need To Make A Longbow
Making a bow is no simple endeavor (unless you want to make a green bow from a sapling).
↓ How to Make Your First Long Bow from a Sapling
For more advanced longbows, you’ll want to use some specialty tools.
Hunter-gatherers and Ute tribesmen did not have fancy drawknives, shellac, or fletching jigs, yet they built wonderfully functional longbows.
But the fewer tools you choose to use, the harder and more painstaking this project becomes.
Some of these resources are necessary – those marked with *s. Make sure you have what you need before getting started.
Time
Do not kid yourself.
This project isn’t the kind of project you will be able to knock out some lazy afternoon after a long day at the office.
It’s a time-consuming, highly involved undertaking.
Make sure you have the time to invest. Otherwise, your bow will be half-assed and likely useless.
Wood and materials
- Tree Trunk/Pole * – This can be ordered at a lumber or hardware store, collected in the woods, or bought online. There are some places where one can acquire this essential piece. Choosing the right type of wood to use can be difficult, but we’ll get to that later.
- A 2X4 – The wooden block should measure about 40” long (no shorter than 30” ).
- 2 to 4 – 40 Watt Light Bulbs
- Several Pieces of Plywood
- Parachute Chord – Eventually, you’ll string your bow with this, but not for archery purposes.
- Bowstring * – B-50 bowstring material (or your preference).
- Shellac *
- Gorilla Glue (or another type of wood glue).
- Finish – Choose the color yourself.
- Satin and clear polyurethane.
Tools
One can build a bow with nothing more than a hatchet, but it is significantly easier to use specific tools:
- Hatchet *
- Drawknife * – This is probably the most important tool you will use while building your bow, so don’t skimp on this. You can buy a decent one for $45, and the middle-shelf draw knives will be even cheaper.
- Rasps * (hoof/farriers, Nichelson #49 & 5#50)
- Cabinet Scraper * – You may not HAVE to use this, but it could be useful.
- Pocketknife – hopefully, you already own one of these tools. If you don’t: get out there and buy one! Pocket knives are unbelievably versatile tools.
- Sandpaper * – 80-, 150-, and 220-grit.
- File * – Chainsaw files will work best because of their small, detailed function.
- Vice – Most woodworking projects require that you use a vice at some point or another. These are available at several retailers; you should have no problem finding one of these.
- Sledgehammer *
- Wedges *

Want a free 78 item prepper checklist?
Click here to instantly download this Complete Checklist PDF. No purchase necessary.
Getting Started: Making Your Longbow
The more effort you put into the design and construction of your bow, the better the outcome.
Patience and meticulousness will help to improve the results of your labor exponentially.
Toys are easy to build, but useful survival tools are often difficult.
Wood longbows are traditionally fashioned from the core of trees.
It takes a lot of attention to detail and patience to shave away one growth layer at a time, but it is how you create a flexible and functional bow shaft.
There are several steps involved in making a longbow, so prepare yourself:
Picking the Right Type of Wood
Opinions differ on what is the best wood to make a bow.
A degree of personal preference is involved in selecting the wood.
It depends upon your skills as a carpenter, tool experience, size, strength, skill as an archer, and body type.
Here is a list of different types of wood that are up for the job:
- Yew – Very popular for centuries throughout Europe, this lightweight wood is good for simple, short-lived bows with a light draw weight. It’s the only non-hardwood suitable for creating bows and is one of the best! Yew is good for beginners because it usually has fewer knots.
- Elm – Creates short, stout bows with thick limbs. Like Yew, the bows Elm yields are short-lived and have a lighter draw weight than other woods.
- White Ash – Yields shorter, stouter bows that are less climate-sensitive and last a little longer. It has a moderate draw weight but is prone to compression cracks on the belly of the bow.
- Hickory
- Oak (White Oak/Red Oak)
- Maple
- Elm (American Elm/ Red Elm)
↓ Best wood for making bows? My TOP 5
Picking the Right Tree
This step is just as important as selecting the right wood.
The results will be disastrous if you choose a short, stumpy, knotted section of some timberline defect.
Here are some criteria to follow when selecting the right tree:
- 6-8 feet of straight trunk section.
- The tree’s bark runs vertically without “spiraling.”
- As few knots, limbs, bumps, or swales as possible (ideally none).
When you cut the tree and remove your desired section, it is best to coat the wood with shellac or wax to prevent any cracking and avoid rot when brought inside.
↓ Bow Woods. How I Identify Tress for my Longbows
Splitting off Staves
Apparently, you cannot just stain and string an 8-inch diameter log and call it a longbow.
The wood must be divided into staves first, and an 8” diameter will roughly produce six bow staves (so don’t worry if you mess up on the first one… or two).
If you have a circular saw and something similar, you can kerf the log to ensure it splits along exactly the right lines.
With the wedges and hammer, split the log lengthwise until you have some staves that are larger than the intended, finished length – roughly 2-3” in diameter.
Once again, shellac them when these staves are split to prevent cracking.
↓ Osage: Harvesting & Splitting
Shaving The Staves
The first part of shaving your staves is to note the growth rings: summer growth rings are fatter and more distinct, and winter growth rings are small denser laminations.
You will want to select a summer growth ring for the belly of the bow.
Secure your stave in the vice and begin to draw off layers.
Shave away wood until you have reached the winter growth ring just above the summer ring you have selected for the belly.
Pare away this final growth ring with the cabinet scraper, following the growth ring from one end of the stave to the other.
The more precise you are with this step, the better off you will be down the line, so take care to shave, draw, and pare as carefully as possible.
Once finished, shellac the stave to prepare it and protect it from cracking during the next step.
↓ How to make a longbow – Part 1: Backing an Osage Stave
Drying And Shaping The Stave
Pare the stave with a hatchet and drawknife so that it is only slightly larger than the intended product. Shellac the back.
You can build your drying box out of a few pieces of plywood and a couple of 40-watt light bulbs.
A drying box is a relatively easy device to build, and it is pretty cheap for what a difference it makes.
Drying on a shelf in the garage will do, but you probably will not be able to get the wood as close to the desired moisture content.
Now comes the tough part:
Testing Your Patience
The stave should dry for 3-4 weeks at the minimum, and some bow makers even suggest you let the wood dry for an entire year.
Regardless of how long you let the bow sit when you pull it out, it should be around 15% moisture content (8% is ideal).
Moisture measuring devices can be purchased at almost any hardware store.
When the time has finally come to move on with the project, extract your stave from wherever it was drying and very carefully draw the outline of your finished bow onto the stave with a marker.
On Native American bows, the center 8” is narrower than both the limbs for the handle, and the belly tapers off at the end of the limbs.
Mark the shape you want to cut out.
Reduce the stave to your drawn outline using the drawknife and refine the form with a pocketknife to get the final details.
Lightly sand the edges and tips and smooth out the front and back surfaces.
Finally, create two deep 45-degree notches for the string on either end of the bow using a chainsaw file.
↓ How to make a Longbow – Part 2: Layout & Roughing out
The Art Of Tillering
That’s right. It is an ART.
And it is perhaps one of the most important steps in this project.
When you look at an unstrung longbow, it is not straight like your staves.
It is curved slightly.
Tillering is the method by which you achieve that curve.
Remove wood from the belly with a file and cabinet scraper until the libs are thin enough to bend.
Floor Tillering
Holding one tip in hand and resting the other on the floor securely against your foot.
At first, bend the bow gently to test the flexibility.
Begin to shave off small amounts of wood between each bending session, creating more and more arc.
But be VERY CAREFUL not to crack the stave – otherwise, start starting over.
As you do this, keep a wary eye open for any flat spots or points of resistance and shave them away.
The amount of wood you shave off should get increasingly smaller as you get closer to a finished product.
Inspect regularly along the process for any cracks or imperfections – if anything but small cracks on the back develops, you will have to start from scratch.
Once the bow is bent enough to string, bust out that hemp or parachute cord and tie it off.
There should be about seven inches between the bow’s belly and the string on a properly strung bow.
Tiller Tree
This is why you need a 2×4.
Stand the block up on one end and use a file or saw to create angled notches every inch or half an inch along the long side.
Here is a video of building a tillering tree:
↓ Building a Tillering Tree
Fasten the tiller tree upright against a wall and place the belly of your strung bow on the top.
Carefully start to draw the string and rest it in the tiller tree’s notches to increase the draw of your bow gradually.
Leave the string on each level for a few minutes to adjust the wood.
A typical draw length is about 28 inches, so you should be good to go when your bowstring hits the 28-inch mark on the tiller tree.
Once again, shave away any flat or compromised points of weakness as you do this.
The end goal of tillering is to create a perfectly even bend in both limbs.
Once this has been achieved, take the bow and draw it in front of the mirror.
Do this repeatedly until you identify which of the two limbs is stiffer.
The stiffer one should become the bottom of your longbow.
Use your file to create a small indentation on the handle for the arrow (right or left, depending on which hand you shoot with).
↓ How to make a Longbow – Part 3: Tillering
Finishing Your New Longbow
Sand the entire bow with 80-, 150-, and 220-grit sandpaper and shellac again for good measure.
At this point, you can decide if you want to finish your bow or not.
It is a personal choice, but remember, the darker the color of your weapon, the harder it will be to spot in the brush or woods.
Seal with three coats of clear gloss polyurethane and one final coat of satin polyurethane.
Wrap your handle in nylon cord, hemp cord, or leather chord using the “whipping” technique.
Apply a light coat of clear glue (like Tightbond III) and let it dry.
Finally, you can string your bow with an actual bowstring, and you are ready to get out there.
You have a completed, one-of-a-kind handmade hunting longbow – enjoy!
Want a free 78 item prepper checklist?
Click here to instantly download this Complete Checklist PDF. No purchase necessary.The Final Word
There is nothing quite as satisfying as hunting live game with a longbow you made with your own bare hands.
It is a very human experience. But more importantly, once mastered, it’s a survival skill that can never be taken away from you.
Even if you are not into hunting, using a handmade custom bow to practice archery is ideal for survival.
It is the original long-range weapon and a tool that helped our species proliferate from a few small bands of wandering tribes into the great and comprehensive society we live in today.
It may also be a weapon that keeps your family safe if society collapses back into ancient times.
Why Trust Skilled Survival...
Go here now to review a full breakdown of:
- Who We Are
- Our Credentials
- Our Mission
- & Product Recommendations...
Here are a few highlights of our teams credentials & certifications:
- Certified Member of a Mountain Search & Rescue Organization
- Plant Emergency & Safety Leader for a Major Food Manufacturer
- Member of the 10TH Mountain Division Hut Association
- Certifications: Avalanche 1, WFR, CPR
- Official Gear Tester for Numerous Outdoor Gear Companies
- Countless Multiday Backpacking trips into Remote Wilderness
- Bachelor's Degree In Mechanical Engineering
- Bachelor's Degree In Civil Engineering
- Bachelor's Degree In Biomedical Engineering
"It takes 20 years to build a reputation and five minutes to ruin it." - Warren Buffett
We're fully aware that trust is NOT something you GET but is EARNED.
And we'll continue to earn YOUR trust through our forthright and honest approach with each new Blog Post, Guide & Product we create...
Will Brendza

P.s. Do You Live In A 'Danger Zone' County?

Find out now using my Danger Zone County List & Special Report it’s absolutely FREE.
In minutes you’ll know EXACTLY where you stand and if you should be worried or not..
So click here to get my FREE Danger Zone County List & Report…
Recommended Reading
Survival Pack: How To Build One NOW (before SHTF)
Survival pack list From Scratch. Packs That Will Make You A Hero To Your Family. Plus, Some Of Th Best Packs You Can Buy
Best Survival Packing List To Plan For An Evacuation
Everyone needs a survival packing list to organize their escape. That way you won't regret leaving something critical behind.
13 Best Wild Edibles ANYONE Can Find Nearly Everywhere…
Discover the best wild edible plants you can find and eat nearly anywere. Knowing and identifying these wild edibles could save your life.
How To Make Catfish Bait: My Grandpa’s Ultimate Recipe
I want to share with you what I consider the best catfish bait recipe. Here's how to make stink bait that will get the catfish to bite.
Paracord Projects: 17 Surprising Things You Can Make
I share the best paracord projects that are both fun and useful. By doing these crafts you'll always have lifesaving cordage on hand.
Best Survival Skills Every Adventurer Should Learn
The best survival skills will keep you alive even in extreme conditions. 1. Water 2. Shelters 3. Fire 4. Navigation 5. Signaling 6. Medical 7. Foraging...