 Today I’ve got something really important to share…
A Complete Guiding On Buying (& Using) Mylar Bags For DIY Stockpiles
Because they turn the chore of storing calories into a simple, easy, and, dare I say “fun”.
And even MORE important, they extend your food storage shelf life…
We’re talking from years to decades!
TOPICS IN THIS GUIDE… ↓(click to jump)
- What Is Mylar Anyway?
- Why Use Mylar For Food Storage
- How To Use Mylar For Food Storage
- Mylar’s Biggest Weaknesses
- Oxygen Absorbers / Desiccants
- How To Seal With Mylar Bags
- DIY Food Storage Organization Tips
- Mylar Food Storage Action Plan
Want a free family-first food planning guide?
Click here to instantly download this Complete Checklist PDF. No purchase necessary.What Is Mylar Anyway?
The DuPont Chemical Company invented Mylar in the 1950s.
Simply, it’s a polyester film made from stretched polyethylene terephthalate (try saying that 5 times fast)!
It’s extremely light, flexible, and thin.
But it’s very durable and strong.
That’s why you find it being used in:
- High atmospheric helium balloons
- solar filters
- emergency survival blankets
- and insulators
The bottom line is:
Mylar is amazing stuff and ideal for long-term food storage.
Go here to learn even more about polyethylene terephthalate.
Why Use Mylar Bags For Food Storage?
Mylar bags are an ideal tool for food storage due to it’s high tensile strength, flexible material, and isolating properties.
Or in layman’s terms, they’re strong, light, and tight.
- Strong, so you can fill them and seal them without worrying about ripping
- Light allowing the bags to conform to the food items and to collapse when removing oxygen (more on this later)
- Tight, so once sealed, they will isolate the product inside from the outside
This isolation lets you control oxygen content, humidity, and light exposure.
And the key to having your food stockpile last decades is to remove as much oxygen, moisture, and light as possible.
Mylar bags are the secret weapon of long-term food storage.
It’s the best bag for long-term food storage and nothing else comes close.
That’s why most commercially available survival food kits also use Mylar pouches.
Watch this excellent video to SEE how these bags work for food storage:
↓ Using Mylar Bags for Food Storage
Want a free 78 item prepper checklist?
Click here to instantly download this Complete Checklist PDF. No purchase necessary.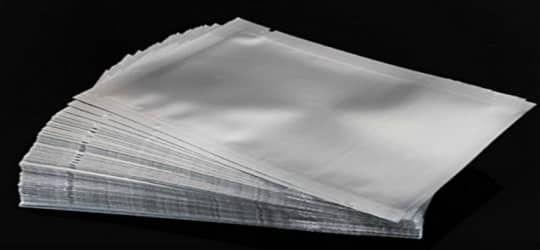
How To Use Mylar For Your Food Stockpile
The first step to using Mylar for food storage starts with purchasing the right ones.
There are many sizes and thicknesses available.
To keep things simple, I recommend you buy just two sizes – large and small.
Small Bags
For the smaller size, stick with 1-gallon bag sizes.
They are perfect for smaller food items you don’t want to store in bulk amounts.
Food items include spices, baking powders, salts, dehydrated meats, and fruits.
Large Bags
For larger bulk grains such as rice, beans, wheat, etc. you’ll want a larger size bag.
And the 5-gallon size is perfect for these.
5-gallons is a large enough volume of food but not TOO heavy.
Plus, 5-gallon bags pair perfectly with 5-gallon buckets, which adds a nice advantage (as we’ll discuss shortly).
As far as thickness goes, the typical range of options is 3.5 miles up to 7 mils.
The higher the thickness, the better the bag is at keeping out moisture and light.
Unfortunately, the thicker, the more expensive.
So you’ll need to decide what mil thickness is right for you.
I recommend you stay away from the 3.5 mil bags.
I’ve seen some 3.5 mil bags where you can see light penetrate the bag.
Light penetration is not what you want!
So I caution you NOT to go with the cheap 3.5 Mylar.
You should focus on protecting your most important investment (i.e. your food stockpile) by using at least 4.3 mils.
For more on mils and Mylar watch this video:
↓ Different Sizes and Thicknesses of Mylar Bags
Want a free family-first food planning guide?
Click here to instantly download this Complete Checklist PDF. No purchase necessary.
Mylar’s Biggest Weakness = Rodents
Critters can chew through walls!
So the only way to protect your bulk foods from these persistent rodents is to put your bags into thick hard plastic buckets.
Because they will chew straight through unprotected Mylar.
The great thing about using 5-gallon Mylar bags is that you can use them with 5-gallon food-grade buckets with lids.
So you fill and seal the 5-gallon bag and then put this bag into a protective 5-gallon bucket.
This helps to keep rodents out of your survival food!
This is critical to protect your calorie investment.
I also highly recommend you purchase new food-grade buckets.
You never want to store your food in buckets NOT designed for food storage.
Food-grade buckets ensure that the material makeup of the bucket itself doesn’t contain harmful chemicals or dyes.
These are chemicals that can leach into your dry foods and grains over time.
If you decide to purchase used 5-gallon food-grade buckets, be certain they were never used to store paints, fuels, or oils.
Just because they “look” clean doesn’t mean they weren’t used to storing harmful chemicals in the past.
These stored oils, over time, will seep into the material makeup of the buckets.
Don’t risk your family’s health to save a couple of bucks.
Invest in new food-grade 5-gallon buckets with lids.
Here’s a video that proves what I’ve been saying:
↓ Mice vs. Mylar
Want a free family-first food planning guide?
Click here to instantly download this Complete Checklist PDF. No purchase necessary.Add Oxygen Absorbers / Desiccant
Now before we seal your Mylar bags, you must add oxygen absorbers.
The oxygen absorbers do exactly what it sounds like; they absorb oxygen.
You want to add the right number of oxygen absorbers into your bag BEFORE you seal them.
Then once you seal the bag, the oxygen absorber will pull (and trap) the oxygen out of the air.
Using oxygen absorbers is important since oxygen is one element necessary for bacteria to grow.
But, you must figure out the right amount of oxygen absorbers to add…
- If you don’t add enough, you’ll leave oxygen to feed any mold growth.
- But if you add too much, then you’re just needlessly wasting money.
You can normally find oxygen absorbers in 50, 100, 300, 500, 1000, 1500, and 2000 cc sizes.
So now you need to figure out how many of these to add to different-size bags.
Figuring this out can get technical with equations, but I hate math.
So instead, watch this video:
↓ Selecting the Proper Oxygen Absorber Size
The bottom line is:
I’d rather err on the side of using a few too many oxygen absorbers.
Why? Because they’re cheap food stockpile insurance.
You can get a pack of one hundred, 100 cc absorbers for about $10 (or 10 cents per 100 cc).
So cheap!
You can also use desiccants instead of oxygen absorbers if you’d like.
They pull any trace amounts of moisture out of the food.
They cost a bit more, but the best ones can be reused.
Here’s an article about desiccants.
How To Seal Your Food With Mylar
Once you have your Mylar bags, oxygen absorbers, and food, you’ll need one more item before you can start sealing:
A heat source.
Proper heat equals a good seal which is essential to protecting your long-term food.
If you don’t get the seal right, then your food WILL NOT last decades.
So you can not afford to get this wrong.
Watch this video to see how to seal your Mylar using items you probably already own:
↓ How to Seal Mylar Bags Using Iron Vs. Flat Iron Vs. Impulse Sealer
The step-by-step instructions for getting an excellent seal are three-fold:
1 . First, you need the bag to be completely flat, 100% free of debris.
If you try to seal your Mylar bag and it’s not flat, it won’t be reliable.
Because the seal occurs when the Mylar material begins to melt.
When both sides of your bag melt, it co-mingles.
It’s similar to welding metal.
You melt the material until it starts to liquify.
Unlike solids, two melted materials can become one.
Then you remove the heat, and the soft melted material will go back to being a solid.
This is exactly what your seal is.
So if you’re trying to get both sides of your bag to melt together, a wrinkle allows a pocket of air to enter the equation.
This pocket of air will reduce the effectiveness of the seal.
So even if your seal seems good initially, it will be weak at the location of the wrinkle.
And over time, this weak spot may break open.
2. The second key to getting a good seal is to remove all foreign particles.
Small particles of food or dust in your seal can compromise its integrity.
Having food particles in the seal reduces the Mylar-to-Mylar contact by introducing a foreign body between your seal.
This is NOT okay.
Again, this weakens your seal over time and could ultimately compromise your food storage efforts.
3. The third seal variable for reliable seals is heat control.
Too much heat, and you’ll melt holes in the seal.
While not applying enough heat results in the material not completely melting.
The seal may just get sticky and act like it’s holding.
But it’s not completely locked together as strong as it should be.
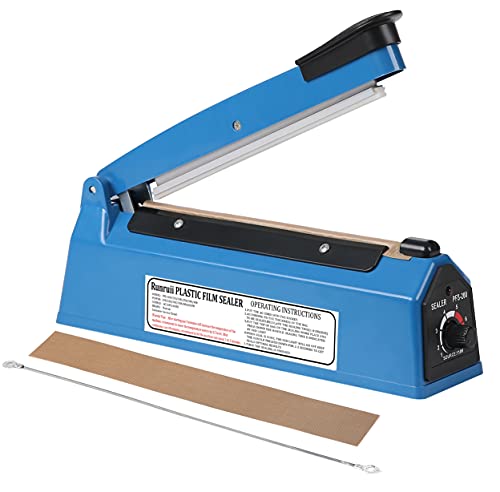
![]() So if you want to ensure you control the heat for the best seal, you should invest in a bag sealer like this one.
So if you want to ensure you control the heat for the best seal, you should invest in a bag sealer like this one.
Yes, it costs a little bit more than cheaper options, but we’re talking about what could be your best investment ever.
Worth every penny, in my opinion.
For those who want to go the cheaper route, you can use a clothes iron or hair straightener.
These will work for sealing your Mylar bags.
But you may need to do some testing before assuming the seals will hold long-term.
A third solution is to use a vacuum sealer.
These devices remove excess air from your bags as well as seal them.
The only problem is Mylar bags are smooth, while food-saver bags are dimpled.
The dimples are essential for the vacuum sealer to work its magic.
With smooth Mylar, the vacuum function won’t work.
But there is a workaround.
This video shows how to use your vacuum sealer on smooth Mylar bags:
↓ Vacuum Seal Bags, Problem Solved!
So if you have a vacuum sealer, THIS is the best way to seal your Mylar bags.

![]() If you don’t own one yet, then it’s a fantastic food storage tool.
If you don’t own one yet, then it’s a fantastic food storage tool.
You can use it for all your frozen meats and your other food storage needs.
Win, win.
Want a free family-first food planning guide?
Click here to instantly download this Complete Checklist PDF. No purchase necessary.DIY Food Storage Organizational Tips
Like all your preparedness efforts, you’ll want to organize EVERYTHING.
It’s important to know exactly WHAT’s in each bag or bucket without opening it up.
And you’ll also want to know the exact date you sealed them up.
The easiest way to accomplish this is by using a Sharpie.
Mylar bags are easy to write on with a Sharpie marker.
However, they can smudge if you don’t let them dry.
So my favorite option is to use sticky labels.
I use a labeler to help keep all my emergency preparedness tasks organized.
For example:
I’ve labeled all of my home’s utilities for my family.
Such as our main water shutoff valve and natural gas shut-off value.
I realize I won’t always be home, and my family needs help knowing which valves to turn off in an emergency.
It helps me sleep a little better at night.

Another great way to keep everything organized is to add the information section of the food’s original packaging.
So if it’s a bag of beans with the name and ingredients, fold it up and put it on the top of the bucket between the bag and bucket seal.
That way, you have all the info on the product you’re storing.
If the product you’re storing is from a box, just cut out the section of the box worth keeping.
And, again, add it to the bucket for future reference.
Now it’s time to put it all together.
Here’s a video that wraps up the ENTIRE process using Mylar, 5-gallon buckets, and keeping everything organized:
↓ Urban Survival – Long-Term Food Storage
Want a free family-first food planning guide?
Click here to instantly download this Complete Checklist PDF. No purchase necessary.
Mylar Food Storage Action Plan
If this was all new to you, I bet you’re surprised how easy using Mylar can be.
You must invest in Mylar bags, oxygen absorbers, 5-gallon buckets, and some of your time.
Then it’s time to put it all together and start your emergency food storage plan.
- Decide which foods you want to store and buy them.
- Purchase your bags in the right sizes (1-gallon / 5-gallon).
- Make sure you have plenty of oxygen absorbers.
- Purchase a few 5-gallon food-grade plastic buckets.
- Make sure you have a heat sealing device (recommended heat sealer).
- Have your organizational tools (sharpie, labeler).
- Add ingredients, add oxygen absorbers, and seal the bags (if using buckets, seal after they are filled and in the bucket).
- Store your Mylar bags in buckets in a cool, dry, safe location for maximum shelf life.
- Sleep just a little bit better at night.
Take action today because knowledge without action…is worthless.
Why Trust Skilled Survival...
Go here now to review a full breakdown of:
- Who We Are
- Our Credentials
- Our Mission
- & Product Recommendations...
Here are a few highlights of our teams credentials & certifications:
- Certified Member of a Mountain Search & Rescue Organization
- Plant Emergency & Safety Leader for a Major Food Manufacturer
- Member of the 10TH Mountain Division Hut Association
- Certifications: Avalanche 1, WFR, CPR
- Official Gear Tester for Numerous Outdoor Gear Companies
- Countless Multiday Backpacking trips into Remote Wilderness
- Bachelor's Degree In Mechanical Engineering
- Bachelor's Degree In Civil Engineering
- Bachelor's Degree In Biomedical Engineering
"It takes 20 years to build a reputation and five minutes to ruin it." - Warren Buffett
We're fully aware that trust is NOT something you GET but is EARNED.
And we'll continue to earn YOUR trust through our forthright and honest approach with each new Blog Post, Guide & Product we create...
Prepare, Adapt & Overcome,

P.s. Do You Live In A 'Danger Zone' County?
Find out now using my Danger Zone County List & Special Report it’s absolutely FREE.
In minutes you’ll know EXACTLY where you stand and if you should be worried or not..
So click here to get my FREE Danger Zone County List & Report…
Recommended Reading
Emergency Food Storage When Calories Become Scarce
Building your emergency food storage doesn't have to be complicated. We break things down into simple steps to help you do it right.
The Most Nutritious Survival Foods You’ll Actually Love
What are the best survival foods? It depends on your goals. We look at different scenarios to help you stockpile the best emergency foods.
Dehydrating Fruit: How To Preserve Those Delicious Calories
Dehydrating fruit is a great way to store tasty calories for long-term storage. We should you the best way to dehydrate some for emergencies.
Unique Food Storage Ideas: The Most Surprising Locations
Want a large emergency food stockpile but living in cramped quarters? Don't let this ruin your preparedness passion! Try these unique food storage ideas.
Best Prepper Foods To Stockpile For Food Storages
What's the worst-case scenario if you choose NOT to stockpile any food? Starvation. That's why prepper foods are such a wise investment.
Valley Food Storage Review: An Expert Puts It To The Test
Unbiased and thorough Valley Food Storage review covering food supplies, packaging, taste, and shelf life. Don't buy without reading this...