 Today, I have something really important to share…
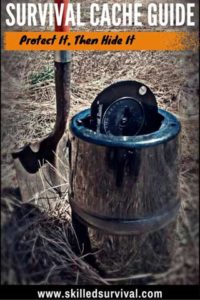
A Complete Guide On How To Plan, Hide, Bury & Protect A Survival Cache
Because it’s a wise tactic to spread your supplies around in hidden locations.
- That way you don’t lose EVERYTHING.
- AND caches can provide extra supplies along a bug-out route.
This helps keep pack weight down and allows you to restock as you go.
So today, I’ll share the best survival cache ideas, tips, tricks, and techniques to avoid costly mistakes…
TOPICS IN THIS GUIDE… ↓(click to jump)
- Cache Options & Environments
- Items To Put Into Your Cache
- Types Of Cache Containers
- Cache Diversification Strategies
- Best Cache Container Options
- Waterproofing Your Cache
- Unique Cache Stash Locations
- How To Bury Your Cache
- Where NOT To Bury It
- How To Mark Your Cache
Want a free 104 item bug out bag checklist?
Click here to instantly download this Complete Checklist PDF. No purchase necessary.Survival Cache Options & Environments
A survival cache is a well-hidden stockpile of survival supplies.
A collection of ‘extra stuff’ to keep hidden in reserve – just in case.
But What, Where, and How are the three biggest questions to chew on before assembling your cache?
Options such as:
- The type of containers to protect your supplies from the elements
- The right supplies to add to your cache
- Ideal locations to keep your cache hidden
- How to hide or bury your survival cache
- The number of supplies you should add
One factor is adapting to your geographic location.
Different environments have unique best practices.
Swamp Caches vs. Desert Caches vs. Mountain Caches, etc.
Each environment has its own unique challenges.
Ones you must be aware of (and overcome) to achieve success.
Items You Should Put Into Your Cache
Fire Starting Tools
One of mankind’s most important survival tools.
Keep your cache filled with waterproof matches, lighters, and strikers.
Otherwise, you may have to try starting a fire with sticks.
Doable but it’s so much easier with a Bic.
Medical Supplies
I don’t recommend caching a full paramedic duffel bag.
But keeping a few bandages, sterilizers, and basic over-the-counter medications.
These medical supplies can improve your chances of survival.
In a disaster, when medical supplies are short, even basic infections can prove deadly.
So prepare for that.
And decide how far you want to take it.
Here is an excellent article on How To Build a Tactical Medical Bag.
Flashlight
Artificial light is important for low light and night survival.
Plus, our country’s electricity grid is very fragile.
So keep a high-quality EDC flashlight and some spare batteries in your cache.
Also, throw a few candles in there.
And maybe even keep a gas lantern and some fuel as well.
Defense (guns & ammo)
Few things are as important as having the tools to defend your family.
Weapons and ammunition enable you to do this.
Storing ammunition in your cache is a good idea.
Similarly, survival knives and survival hatchets double as self defense tools.
Should you store an entire survival gun? … That’s up to you.
Obviously, there are some problems with stashing guns.
- They are expensive, for one.
- They are also hard to keep from getting rusty.
- And what if someone finds your cache and steals it…
Who’s to say they will not commit a crime with the weapon registered in your name?
It’s a risk you need to consider.
Utility Tools
Tools are helpful for all aspects of life (survival or not).
Hatchets, hammers, knives are both tools and weapons.
So they are ideal for caches.
Paracord is an easy-to-store utility that has innumerable survival uses.
Wrenches, small saws, nails, screws, hammers, and screwdrivers are some other tools that are useful during times of chaos.
Entertainment
Keeping the mind healthy boosts morale and sanity.
Especially if you’re holed up somewhere remote.
Having a few survival guidebooks, games, a survival card deck, will keep you from leaping off the deep end.
They can also be used for bartering in a pinch.
Communication
Everyone should have a hand crank radio to receive broadcasted disaster information.
So add one to your cache.
Vices
Even if you never partake in any of these vices…
They’re one of the best bartering supplies in dire times (and if you do partake, “smoke ’em if you got ’em”).
Cigarettes, alcohol, cannabis, coffee, and magazines are not necessary for survival but highly desired.
These are also great for making friends.
And friends are important allies in survival situations.
Money
This item goes last on the list because the more chaotic and disastrous things get, the less important paper money will become.
By the time you get to your cache and break into its supplies, those hundred-dollar bills might have more value as kindling than for trade…
Best Cache Containers
Selecting a container is the first step.
Your choice should be primarily driven by the environment you plan to store them.
Obviously, the old-fashioned buried wooden chest or barrel is not going to cut it.
Because wood is porous, holds moisture, and is prone to rot over time.
Rot is bad for buried gear.
Moisture is your number 1 enemy.
So instead of wood, use plastic and metal containers only.
Yes, metal does rust over long periods of time.
But metal is also highly resistant to rodents and insects.
Thus, making it an excellent container in low-moisture desert conditions.
Wet regions require your caches to be waterproof,.
Like plastic cases – but unfortunately, plastic is more vulnerable to the gnawing teeth of rodents.
So you have to evaluate your environment and plan accordingly.
Here is a list of some potential configurations:
PVC Tube Cache
PVC is designed to be buried in the ground and comes in just about any size you can imagine.
And PVC is relatively inexpensive and readily available.
PVC caches make for a fairly straightforward DIY project.
Just make sure you use an amazingly tough sealant to lock and seal the end caps.
It needs to be 100% waterproof!
Garbage Cans or Barrels Cache
These can be plastic or metal but the biggest challenge is sealing them from moisture.
If you plan to bury a garbage can underground, duct tape or cordage isn’t a good enough seal.
You need a way to create a high-quality waterproof seal.
Also, big caches are difficult to bury because of their size.
For these reasons, I prefer medium-sized or smaller caches vs. a single large, poorly sealed cache.
Pelican Case Cache
Pelican cases can be used.
They are built to be tough and weather-resistant, so they perform well under stressful conditions.
These can be bought in both plastic and metal options and also come in a variety of sizes.
That’s why they’re my preferred cache container.
Again, use the best sealer you can find and apply it liberally to the lid to ensure you keep moisture out.
Waterproof Box Cache
Easily obtainable online and at outdoor or surplus stores. They keep moisture out and are resistant to weathering.
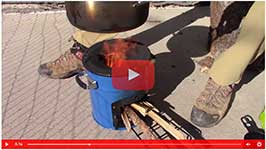
↓ Hiding a Survival Kit Cache using a Pelican 1150 Case
↓ Build And Bury A Survival Cache
↓ Digging Up A Survival Cache After 1 YEAR!!
↓ Everything You Need to Know About Supply Caches
Cache Diversification Strategy
When it comes to survival caches, I can’t think of a situation where more is not better.
If having one cache is good – having 10 is better.
The bottom line is:
The more caches increase your odds of having hidden supplies available when resources become scarce.
However, just because more is better doesn’t mean more is easier.
And that’s the rub…
Planning more means you need to:
- purchase more supplies
- buy more cache containers
- find more hidden locations
- work harder to hide them all
- and remember where they’re all located
So you need to decide what’s the right amount and size of your cache network.
I recommend a couple of medium-sized ones first, along with several ones.
This strategy helps spread your survival supplies, effectively taking all of your eggs out of one basket.
Keeping your entire network of caches less vulnerable to a single event (theft/destruction/decay).
That way, you can afford to lose one or two caches and still be ok.
Plus medium and small caches are easier to hide and manage than large ones.
Waterproofing Your Survival Cache
The most important aspect of your container is that it’s waterproof.
As soon as moisture gets into your supply, everything will become compromised.
Even small traces of moisture will spoil organic items (food cache), ruin supplies (matches), and rust metal (gear) items.
For this reason:
I recommend adding an extra layer of moisture protection to your container no matter which type you pick.
Zip locks work well for this task and are very cost-effective.
Heck, you can even double-bag your items with zip locks.
You should also put smaller waterproof containers inside larger ones to help provide another level of moisture protection.
You could put a smaller PVC pipe inside a larger one, both with excellent waterproofed end caps.
Or you can put a PVC cache inside a container.
Redundant moisture protection will help ensure your cache remains bone dry.
You also need to consider trapped moisture.
Many items inherently hold moisture by default.
If you store these items with moisture in it, that moisture will eventually release and turn into condensation and humidity inside your sealed cache.
Potentially developing rust on your gun barrels and ammo.
So if you store anything with moisture in it (i.e. paper, foods, wood) make sure you dry them out as best you can before you store them.
Then keep these items in separate sealed bags to prevent any condensation from affecting other items in your cache.
Starting to see a theme here? Moisture is awful for caches.
Where To Hide Your Cache
The first place most people think of when hiding their cache is to bury it.
But you don’t HAVE to bury your cache.
Intuitively, that’s what you might imagine doing – and indeed, it is an effective way of hiding and preserving your valuables.
But I just want to be clear that it’s not the only option.
For instance, you can store one high up in evergreen trees.
You can tightly wrap them in multiple camouflage tarps to protect them from weather and use lots of straps to secure them to the trunk.
This helps keep large animals (including humans) from gaining easy access.
Another option is to hide it in your car.
This tactic serves a few purposes:
It keeps your supplies close at hand.
So you won’t have to travel far to collect your stash.
It also acts as a form of insurance.
Again, burying your cache is entirely fine, but don’t limit yourself.
Honestly, cache locations are only limited by your creativity.
So here are just a few ideas to help get the idea juices flowing:
- Attics
- Under Floorboards
- High Up In An Evergreen Tree
- In A Hollow Door
- A Vehicle
- In A Secret Room In Your House
- A Hollow Stump
- An Old Abandoned Well
- In An Out Of Commission Chimney
- Inside An Old Tire
- Inside A Gutted-Out Appliance
The key is to make sure your cache locations are:
- Well hidden
- In a remote location
- Diversified
- Accessible in a crisis
- Well secured
Want a free 104 item bug out bag checklist?
Click here to instantly download this Complete Checklist PDF. No purchase necessary.
How To Bury Your Cache
Burying your cache is not your ONLY option.
But it’s still a good one when done properly.
If done incorrectly, your buried cache will not last.
Shovel
Most people have access to a shovel for digging.
But they require manual labor.
And if you’re digging in a remote location take a lightweight survival shovel.
Post Hole Digger
Another tool to get deeper faster is a post-hole digger.
These are ideal for burying slim PVC pipe caches.
But this is also a labor intensive hand tool.
Power Augur
Maybe you’re lucky enough to own a powered augur.
This tool makes this process even easier.
You may even rent a small augur for a day to save your back.
Backhoe
And if you can get your hands on a full-fledged backhoe, then you’re all set…
But the majority of us will dig by hand.
So if your cache is small (water bottle sized), this is fairly easy.
However, if it’s larger (garbage can size), this will take some time and effort.
Hopefully, you’re digging in soft soil.
Hardpan Deserts
But if you’re trying to bury a garbage can-sized cache in the hardpan of the desert…
You may want to rethink your location choice.
However, there is an upside to digging in the hard-pan desert.
Deserts lack moisture.
The reason it’s so hard to dig is the ground lacks moisture.
And moisture is one of the biggest enemies of your cache.
So if you can suck it up and dig through it, you won’t have to worry about double bagging and waterproof.
No moisture means no moisture.
Swamps
Now the opposite is burying your cache in a swamp.
Digging will be easy but keeping the standing water out is going to be a challenge.
My best advice is to use a plastic container with a superb rubber gaskets.
And to permanently seal the access hatch with a lot of waterproof sealants.
You may also want to bury it upside down with the access hatch facing down.
This way if the seal does fail, it won’t fill up with water.
Instead, water may seep past the failed seal slightly.
But the trapped air in the container will prevent your cache from filling up with water.
Which in turn will limit the water damage should your seal fail.
Now, most caches won’t be in these two extreme conditions.
However, I still recommend double bagging all your gear with zip locks.
And burying your container of choice upside down (just in case).
Both of these techniques are cheap water damage insurance.
Also, if you’re burying a metal container use a ton of heavy-duty basement cement waterproof sealer.
Be liberal with this stuff, lay it on thick.
And put multiple layers on before burying.
Where To Bury Your Cache (or where not to…)
Many people want to bury their cache on their own land.
Your backyard might sound like an excellent location (it’s close and easy to access).
But anywhere near homes is where utility lines tend to be.
Stuff happens and utility companies may require digging in your backyard.
So instead, I’d suggest burying them under a concrete slab.
You’ll need to dig both down and sideways to retrieve it.
But this location significantly reduces the chance of an accidental discovery.
I don’t recommend burying one under garage or basement slabs.
Because THAT would take a ton of work to access them.
You’ll need to break through the slab with a jackhammer.
This would create a mess and a racket.
Enough mess and noise to attract unwanted attention.
Another solution is burying one under a sidewalk slab.
Especially if you have a path along the side of your home or in your backyard.
Sidewalks are less prone to accidental discovery.
And you can pry them up pretty quickly with the right tools in a crisis.
You just need a good crowbar, a stable fulcrum, and enough weight.
A nice side benefit to sidewalks is they can hide from metal detectors.
Why? Because metal detectors will pick up the rebar in the concrete masking the metal signal.
Want a free 104 item bug out bag checklist?
Click here to instantly download this Complete Checklist PDF. No purchase necessary.
Burying A Cache On Land You Don’t Own
While burying near a remote road seems to make sense for ease of access.
But what do you think will happen a decade from now when the road gets expanded?
It gets discovered, that’s what.
Plus utilities tend to run alongside roadways.
So new service line installs could dig up your buried cache.
The bottom line:
The harder to access your cache the less likely it will be found.
Also, the deeper you bury it, the less likely it is to be found.
So don’t get lazy and get to work.
Just because you found a great cache location doesn’t mean your task is complete.
The next challenge is remembering exactly where your cache is located…
10, 20, or even 30 years from now!

Don’t Forget Exactly Where You Left It
Ensure you remember where your hiding spots are.
Solely relying on markers that can be moved or cut down is a bad idea.
Trees and rocks seem like good position markers.
But will that rock or tree still be there in a decade or two?
A lot can happen in 20 years.
Are you 100% certain your marker will still be there 20 years from now?
If not use a more permanent location marker.
Once you choose a location, take the time to create a cache map.
But make sure that your map is very well hidden (preferably locked up too).
And drawn in a way that only you and your family can understand.
Don’t let others find your treasure map!
If they do find it, make sure it doesn’t include a bright red X .
So code the map and hide it well.
One idea to keep the map and the locations on two separate sheets of paper.
The map and a semi transparent location marker.
Keep these two distinct sheets of paper hidden and locked in 2 separate locations.
This strategy makes the topographical map without the locations useless.
And the locations without the map useless.
Someone would have to:
- Find and break into two separate locations
- Figure out these two items go together.
Highly unlikely.
Another option is to use a GPS device.
You have to ensure you keep the GPS locations secret (similar to a topographical map).
And have plenty of backup batteries or a way to charge your device.
Hand crank radios work well for this.
They allow you to charge small devices like your phone.
However, you should share your map(s) with your family.
It’s best to trust your cache map to only one or two responsible family members/friends.
Why? Because if you do not make it, it would be a shame for your supplies to be wasted.
So make sure there’s a way for your loved ones to get the cache…
Even if you can’t do it for them.
Final Thoughts
People have been hiding their valuables since the beginning of time.
From cavemen stashing seeds to pirates burying treasure.
And grandparents stuffing mattresses…
People hide supplies to preserve their future (financial or otherwise).
So why wouldn’t you invest in a cache that does the same thing?
Not just gold coins and jewels.
But a food cache in case of famine.
Or a gear cache to your resources in a disaster.
I would argue THAT kind of buried treasure is worth even more than money.
It’s up to you how far you choose to take things.
But even stashing one single small survival cache is better than nothing at all…
Why Trust Skilled Survival...
Go here now to review a full breakdown of:
- Who We Are
- Our Credentials
- Our Mission
- & Product Recommendations...
Here are a few highlights of our teams credentials & certifications:
- Certified Member of a Mountain Search & Rescue Organization
- Plant Emergency & Safety Leader for a Major Food Manufacturer
- Member of the 10TH Mountain Division Hut Association
- Certifications: Avalanche 1, WFR, CPR
- Official Gear Tester for Numerous Outdoor Gear Companies
- Countless Multiday Backpacking trips into Remote Wilderness
- Bachelor's Degree In Mechanical Engineering
- Bachelor's Degree In Civil Engineering
- Bachelor's Degree In Biomedical Engineering
"It takes 20 years to build a reputation and five minutes to ruin it." - Warren Buffett
We're fully aware that trust is NOT something you GET but is EARNED.
And we'll continue to earn YOUR trust through our forthright and honest approach with each new Blog Post, Guide & Product we create...
Will Brendza

P.s. Do You Live In A 'Danger Zone' County?

Find out now using my Danger Zone County List & Special Report it’s absolutely FREE.
In minutes you’ll know EXACTLY where you stand and if you should be worried or not..
So click here to get my FREE Danger Zone County List & Report…
Recommended Reading
Best Fuel Storage Ideas: How To Store Extra Gasoline
Long term fuel storage is crucial in all survival situations, but fuels must be stored properly and safely to keep, especially long term gasoline storage.
How To Store Seeds For Wise Prepping & Survival
When seed saving and seed storage, you must do it right. Learn how to store seeds so they'll thrive the next planting season.
Common Everyday Carry Mistakes YOU Must Avoid At All Costs
The only person qualified to build YOUR Best Everyday Carry (EDC) is YOU. To do it right, you must avoid these common mistakes and pitfalls.
Strategic Relocation: How To Find A Safe Pace To Live
Use strategic relocation to find a safe, defendable location to call home. Your choice of location WILL determine your survival fate.
Map Of Nuclear Fallout: Would I Survive A Nuclear Bomb?
Have you seen a map of nuclear fallout? Or run a nuclear simulation to see the damage a nuke would do to your city? If not, check this out.
Homestead Survival: How To Master Plan Your Own Safe Haven
Use this simple 6 step action plan to successfully plan and build a homestead to survive (and thrive) even if the world falls into chaos...