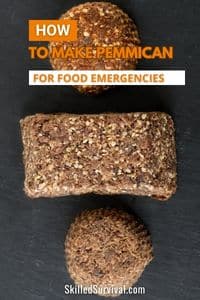
 A Complete Guide On How To Make Pemmican (with history, recipes, & storage plans)
Pemmican is one of the BEST survival foods you can make at home—it’s a true survival superfood.
Packed with protein and healthy fats, it provides long-lasting energy to keep you going through the toughest situations.
The best part? It lasts for years, even decades, without spoiling. Plus, making it yourself is surprisingly easy, making it a perfect addition to any emergency preparedness plan.

A Brief History Of Pemmican
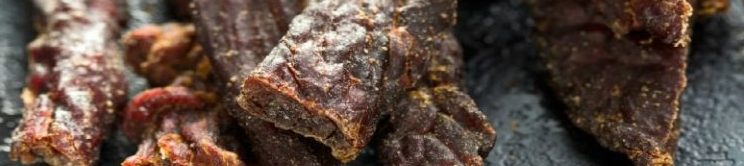
It’s 100% meat. But it’s NOT beef jerky.
The snack was popular among the Natives throughout history. Why? Because it was easy to make, transport, and long-lasting. They made theirs from wild game such as:
- venison
- elk
- and moose meat
After Europeans arrived and tasted it, they quickly adopted it as well. And changed the original recipe to make it themselves.
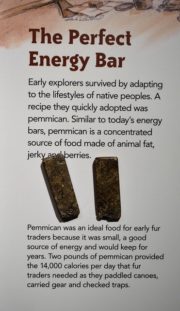
↓ History’s First Protein Power Bar
Fur traders also adopted it. They made it famous as a substantial and hardy survival food. Helping to spread its popularity.
Today, hundreds of years later, we still use this superfood in much the same way. And for similar reasons.

Want a free family-first food planning guide?
Enter your email below to instantly download this Complete Guide PDF. No purchase necessary. 👇 👇Step-By-Step Process
There are more pemmican recipes out there than Carter has pills.
It’s been passed down for generations. It’s an old-world food, and everyone has a special family recipe. But no matter what you add to your recipe, the core process is the same.
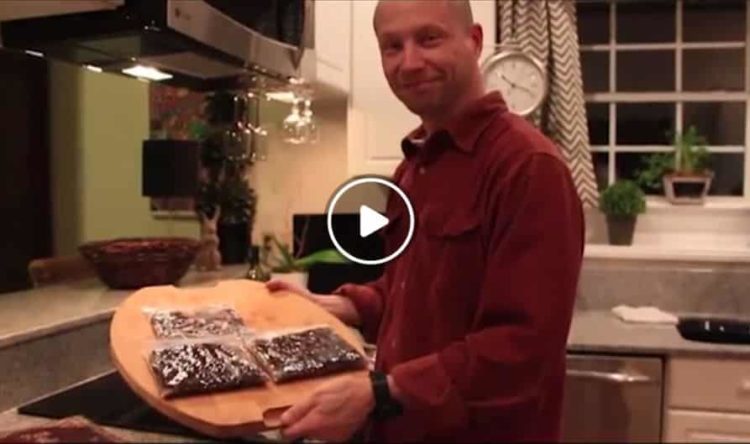
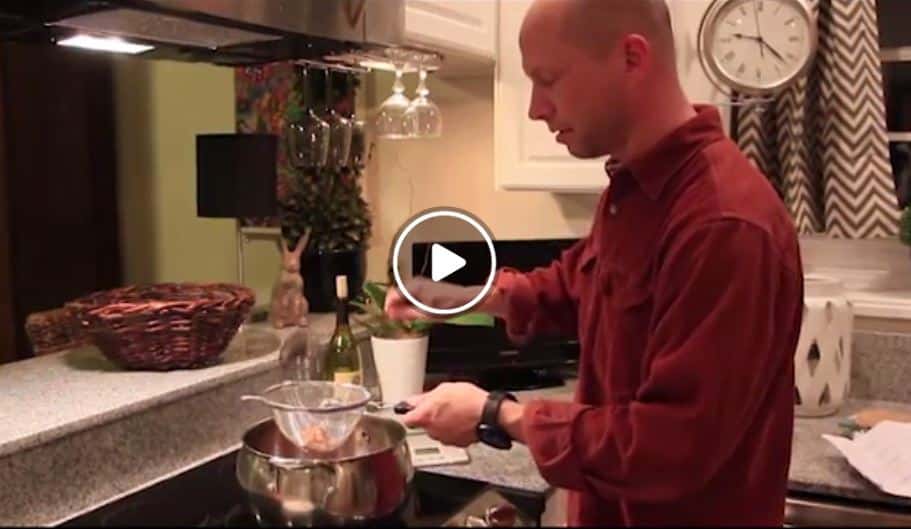
So what follows is the bare-bones instructions for processing meat into bars. For those who would rather watch than read, here’s an excellent “how-to” video:
↓ Video Instructions On Making Pemmican
1. Get your hands on some meat.
Be it caribou, venison, elk, moose, beef, or any meat with natural fat.
Rabbit and fish won’t work. Why? Because they are too lean and don’t provide enough fat.
2. Dry your meat.
Cut off and save all the fat. Slice the leftover lean meat into thin strips.
Those strips can then be dried under direct sunlight. Or in your oven on low heat.
Dry until they’re brittle enough to crack when bent.
3. Grind the dried meat strips.
Food processors work best. But without one, you can mince it with a knife.
If you don’t have access to electricity, use a mortar and pestle. Or even just two rocks in a worst-case scenario.
The meat must be ground as fine as possible. You want a “fine meat dust.”
4. Process the fat you saved in step #2.
Put it all in a pot over low heat. Once the fat has melted and begun to boil, strain it through a mesh strainer.
5. Mix dry extras and meat in a separate bowl.
We’ll discuss what dry extras you can use later.
For now, this is the time to mix all those dry ingredients with your ground-up meat dust.
6. Add the fat to your bowl of dry ingredients and meat.
Pour the melted fast over the dry stuff and start mixing.
7. Begin forming this mixture into larger bars.
Take a shallow pan and pour the mixture while it’s still soft. Let the mixture settle and smooth it out.
When the mixture is dry, cut it into smaller bars for storage.
Again, my recommended instruction video:
↓ How to Make Pemmican


Want a free 78 item preppers checklist?
Enter your email below to instantly download this Complete Checklist PDF. No purchase necessary. 👇 👇Pemmican Recipe Variations
As just meat and fat, pemmican bars taste OK. And ready to provide lots of energy. But it’s always tasty to mix things up. And if you can make your recipe taste even better, why wouldn’t you? There are two types of extra ingredients you can add:
- Dry ingredients
- Wet ingredients
Unfortunately, never add anything fresh.
Adding fresh ingredients (like ripe red tomatoes, for example) will compromise the shelf life. Everything you add must also have a long shelf life.
Dry Ingredients
Dry ingredients include anything with very little moisture.
This opens the door for many variations. Because you can dehydrate (dry) just about anything.
Dry ingredients are mixed in during step #5 above. Some people like the taste of a blend of meat and berries.
Here are a few ideas:
- Dried fruits: mangos, blueberries, raspberries, bananas, apples, kiwis, pineapples, tomatoes, grapes, chilies, etc.
- Dried nuts: peanuts, almond meal, walnuts, chestnuts, pinion nuts, etc.
- Spices/Flavors: paprika, chili powder, onion powder, garlic powder, dried basil, dried oregano, rosemary, coconut oil, etc.
Wet Ingredients
As the name implies, anything that’s not dry. Wet does not mean fresh, though. Do NOT get that mixed up.
Adding fresh ingredients will drastically shorten its shelf life.
Wet ingredients are added during step #7 above. Wet ingredients include (but are not limited to):
- Caramel, syrup, honey powder, molasses, vanilla extract, etc.
Don’t be afraid to get creative. There are a lot of options to customize.
You can make them sweet and tangy or hot and spicy.
Trying different flavors serves three purposes:
- Enhances the flavor value of the bars.
- It lets you explore which flavors you like best (and how much of each).
- It allows you to practice making different batches
Note: Practice makes perfect. Your first homemade batch likely won’t taste as good as your tenth.
Want a free family-first food planning guide?
Enter your email below to instantly download this Complete Guide PDF. No purchase necessary. 👇 👇Storing Pemmican For The Long Haul
So, let’s say you’ve successfully made a batch of pemmican bars.
Now what? Storage! Proper storage is crucial to make sure they last. It can “go bad” relatively quickly if stored incorrectly. However, it can last for decades when stored right.
Food poisoning sucks and can be dangerous. Getting food poisoning during a survival situation is like signing your death warrant.
Use airtight containers.
Vacuum-sealing in plastic bags is highly recommended. Vacuum sealing removes as much oxygen as possible. But zip locks and Tupperware can also work.
Mold needs only a few key ingredients to grow. One of them being oxygen. So, by eliminating oxygen, you remove the potential for mold growth.
Your storage location must be cool, dark, and temperature-controlled.
Light and heat will negatively affect your stockpile. Basements and pantries will work. But my favorite is an underground food storage facility.
Make sure to store it off the ground. This keeps it away from moisture and hungry critters.
↓ What Does 3-Year-Old Pemmican Taste Like?
Reasons to Master The Art Of Pemmican
 It’s a good life skill to have. It’s functional, resilient knowledge. No matter what the world throws at you, you’ll know how to make more. And can rely on it for long periods.
It’s lightweight and easily transportable. You can make it anywhere with relatively few ingredients. You do not have to use it for emergencies only. It’s a great snack for all sorts of outdoor adventures:
- Hunting Trips
- Backpacking Trips
- Fishing Expeditions
- Mountain Biking
- Day Hiking
- Camping
- Road Tripping
- Kayaking
- Mountain Climbing
- Etc.
No matter what you are doing – if it’s athletic, it’s a great snack.
There are also economic benefits. First, you can start selling it. Who knows, maybe you’ll break into the market as the world’s finest pemmican chef. But also, if IT does hit the fan, this food will become a valuable currency.
People will want them and pay for them. You could become the corner market for SHTF protein. It would be like minting your own money.
The Lost Ways – A Tutorial Guide
The Lost Ways has an awesome step-by-step “how to make Pemmican” video.
While a written guide is helpful, watching a video guide is even better. They cover a few additional ideas I did not:
↓ Making Pemmican – Step-by-Step Guide
For novices, I would highly recommend watching the video.
The video details:
- how much meat to use
- how much fat you need
- and what else to add to your recipe
He makes it all in his regular kitchen. You don’t need a meat workshop. Or drying facility to make tasty protein bars. If any of the instructions in this article were confusing, watch the video!
The Final Word
I will say it bluntly and not mince words. Pemmican is the best protein survival food.
Let’s recap:
- If stored and made properly, it can last for up to 50 years and still be fresh and tasty
- It provides boatloads of protein and fat energy, which will burn long and last you all-day
- You can make it from a large variety of wild game
- It’s lightweight and easily packable and transportable
- You can make it cheap, and it requires very few ingredients
- It’s incredibly easy to make and can be done in your kitchen right at home
Any survival food cache without pemmican is incomplete. It’s a useful and efficient food. Every survivalist should scramble to get their hands on some. If you get a good supply at the ready, you’ll be ready for future food shortages.
Give a man a pemmican bar, and he has energy for a day. Give a man a recipe; he has energy for life.

Prepare, Adapt & Overcome,

P.s. - I just found out 2 out of 3 Americans don’t feel prepared for a 3 day disaster!!!

I guess this goes to show how modern society continues to embrace ‘living a fragile life.’ What’s crazy is… it’s so easy to fix.
To make sure YOU have the basics, watch our FREE training on “10 Simple Steps To Basic Preparedness” that shows you HOW.
Nothing crazy here… this isn’t doomsday prepping... just the basics every responsible adult should have before a disaster strikes.Why You Can Trust Skilled Survival...
Go here now to review a full breakdown of:
- Who We Are
- Our Credentials
- Our Mission
- & Product Recommendations...
Here are a few highlights of our teams credentials & certifications:
- Certified Member of a Mountain Search & Rescue Organization
- Plant Emergency & Safety Leader for a Major Food Manufacturer
- Member of the 10TH Mountain Division Hut Association
- Certifications: Avalanche 1, WFR, CPR
- Official Gear Tester for Numerous Outdoor Gear Companies
- Countless Multiday Backpacking trips into Remote Wilderness
- Bachelor's Degree In Mechanical Engineering
- Bachelor's Degree In Civil Engineering
- Bachelor's Degree In Biomedical Engineering
"It takes 20 years to build a reputation and five minutes to ruin it." - Warren Buffett
We're fully aware that trust is NOT something you GET but is EARNED.
And we'll continue to earn YOUR trust through our forthright and honest approach with each new Blog Post, Guide & Product we create...
P.s - I just took this FREE 60-second 'Readiness Score Quiz'👇
AND... I've still got a few gaps in my preps...🤔 But at least, I'm not part of 'The Fragile Masses'. 👍 Find out where YOU stand by answering a few questions...
Header Image Source

Recommended Reading
Long Term Fuel Storage For Survival Emergencies
Long term fuel storage is crucial in emergencies, but fuels must be stored properly especially long term gasoline storage.
How To Store Seeds For Wise Prepping & Survival
When seed saving and seed storage, you must do it right. Learn how to store seeds so they'll thrive the next planting season.
Common Everyday Carry Mistakes YOU Must Avoid At All Costs
The only person qualified to build YOUR Best Everyday Carry (EDC) is YOU. To do it right, you must avoid these common mistakes and pitfalls.
Strategic Relocation: How To Find A Safe Pace To Live
Use strategic relocation to find a safe, defendable location to call home. Your choice of location WILL determine your survival fate.
Nuclear Fallout Map: Would I Survive A Nuclear Bomb?
Have you seen this nuclear fallout map? Or run a nuclear simulation to see the damage a nuke would do to your city? If not, check this out.
Homestead Survival: How To Master Plan Your Safe Haven
Use this simple 6 homestead survival plan to successfully survive (and thrive) even if the world falls into chaos...