 Today I’ve got something really important to share…
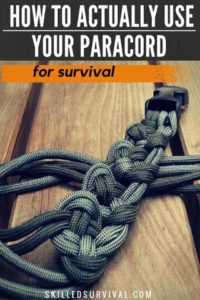
A Complete Guide On 35 Paracord Uses For Survival
Because while many folks wear paracord daily on their wrist, few know how to use it in an emergency.
And that’s a shame!
Today I want to change that and show you all the best uses for paracord to save your life in a pinch.
This guide covers the 35 best survival uses for paracord…
TOPICS IN THIS GUIDE… ↓(click to jump)
- Emergency Paracord Uses
- Paracord For Self-Defense
- Hunter & Gathering Uses
- Traveling & Hauling Uses
- Everyday Survival Uses
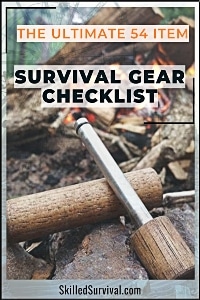
Want a free 54 item survival gear checklist?
Click here to instantly download this Complete Checklist PDF. No purchase necessary.
Emergency Uses
Let’s cover the emergency uses first, as they are the most important to your survival.
1. Suture Threads
Becoming severely wounded in the wilderness is as life-threatening as it gets (especially if not quickly treated).
Many injuries, like open wounds and severe lacerations, have no quick and easy solutions.
You become injured by something as small as falling on a dead branch or as extreme as an animal attack.
But when professional medical attention isn’t an option, you must get creative to survive.
Often the only real option to decrease the risk of serious infection and massive blood loss is to stitch up the wound.
Ideally, you packed a suture kit, but in extreme emergencies, you can use the inner threads as sutures.
Only use these sutures until you can make it to advanced medical care.
Here’s How…
The inner strands are both small enough and strong enough to close a wound in an emergency.
Pull the outer threads away from the casing exposing the internal strands.
Now pull out a few of these strands; the longer, the better.
Now, thread a suture needle leaving a long tail of strand remaining.
Your first suture will begin in the middle of the wound.
Use a good set of hemostats (if you have them with your survival medical kit) and hold the threaded needle to maintain sterilization.
About half a centimeter from the wound opening, push the threaded needle head into the skin.
The needle will exit through the wound.
Readjust the hemostats and thread the needle from the inside of the wound to the opposite side of the wound from where you began.
Pull the thread through the wound, leaving a small tail of thread out from the original entry position.
Take the suture thread with the needle and wrap it around the hemostat head twice.
With the hemostat, grab the thread’s tail and pull it through itself.
Allow the two loops of thread on the hemostat to fall, making a knot.
Pull the thread until the edges of the skin are touching, not overlapping.
Continue this process beginning in the middle of each suture, working in halves.
Here’s a video giving you the basics of suture instruction:
↓ How To Suture: Intro To Suturing Like A Surgeon
2. Arm Splint
Besides open wounds and lacerations, you may run into muscle, bone, or joint injuries.
Pain from such injuries varies in degrees of severity, but the worst cases will leave you 100% immobilized.
Although not immediately life-threatening, a muscle, bone, or joint injury can hinder a rescue.
This raises the severity of your situation by exposing you to the risk of hypothermia, heat exhaustion, or dehydration.
Instead of giving up, use some cordage to splint the injury and control the pain.
Hopefully, it’s enough to find your way to safety and receive advanced medical attention, instead of being left immobile and in the harsh wilderness alone.
Here’s How…
Layout some soft material (jacket, shirt, or socks) under the limb you want to splint.
This soft material is primarily needed for cushioning.
Then lay out a hard object, such as a walking stick, to stabilize the injured limb.
Wrap the cord around the injured limb, cushioning material, and your chosen hard object.
Tie a knot tight enough for a secure hold but not tight enough to limit blood flow.
For a joint injury, tie the knots above and below the injured joint.
For bone injuries, tie knots on the above and below joints. Braid or double/triple up on the cord for added strength.
3. Makeshift Sling
Based on the location of your injury, you may need a sling to control the movement of your injured arm or shoulder.
This will provide similar protection as the splint, but a sling may be your best option as some injuries cannot be splinted.
A sling will provide limited movement allowing you to make it to safety with less pain and further damage to your injury.
Like the splint, you should use a jacket or something soft for comfort and a straight stick or ruler for stability.
Use some paracord to tie a slip knot around the wrist, including the jacket and stick.
Pull the cord back behind the neck and secure it to the elbow.
Place another piece of cloth under the cord on the neck to prevent rubbing and irritation.
Increase strength by braiding or double/triple up on the cord.
Here’s a video showing the splinting process using cravats.
↓ Wilderness Medicine | Leg Splints
Cravats are preferred, but in a wilderness survival emergency, you likely won’t have cravats, but you should have paracord.
4. Makeshift Stretcher
When there are broken bones or severe illness and walking is not an option, you’ll need to make a stretcher.
Why wouldn’t you just come back with help instead of moving the victim?
Because if possible, you should never leave someone alone or split up a group in the wild.
If you leave an injured person, the risk of dehydration, hypothermia, heat exhaustion, or animal attack increases.
These symptoms will eventually lead to delusions and poor decisions.
Instead, with a makeshift paracord stretcher, you may be able to keep moving as a group.
Here’s How…
Find the middle of your paracord and measure out 5 lengths in each direction.
You should have a total of 10 lengths.
This should look like a slithering snake or many flatted “S” shapes strung together.
This will become the part the injured will be lying on.
With the extra piece of cord, tie each of the lengths, creating a loop using a clove hitch (remember the important knots we discussed earlier).
Thread the rest of the cord through the loops and tie the end back to the body of the stretcher.
If you have poles that are the same length as the stretcher, use that instead of paracord for stability.
If not, weaving the cord through the loops will be enough. To add strength, braid or double/triple up on the cord.
Here’s a web page showing what this process looks like.
Also, here’s a quick video showing you what the final product should look like if you do not use poles or sticks for the sides.
↓ Rope Stretching Building
5. Tourniquet
In an extreme circumstance of uncontrollable bleeding, cutting your limb off to survive may be the only option.
A tourniquet is the last resort with arterial injuries or bleeding that won’t stop.
I’d rather have a rapid application tourniquet to stop blood flow, but paracord can do it if that’s all you have.
You must act fast to reduce your chances of bleeding out.
Here’s How…
Braid the cord into a 1 – 1/2 inch width; you risk skin laceration and infection with any lesser width.
Likely, time is of the essence, so it’s imperative that you can braid it quickly.
Wrap it around the limb above the wound and tie a knot.
Now insert a stick through the knot.
Turn the stick and tighten the tourniquet until the bleeding slows and stops.
Now tie off the stick to hold the tourniquet pressure steady without holding onto it with your hands.
↓ Shoelace Tourniquet
6. Rescue Line (drowning/ quicksand)
In the case of a water or quicksand drowning scenario, time is of the essence.
A water rescue may become necessary while fishing, crossing a river, or walking on thin ice.
Or there are times when quicksand is completely undetectable until it is too late.
Use this paracord rescue line technique to keep yourself or your friends safe.
It will keep you far enough away from the danger yourself and provide the necessary leverage to pull a victim to safety.
Here’s How…
Tie a figure-eight knot, steady your stance, and toss the line toward the victim.
If the victim is in moving water, try tying an object to something that floats, such as a log, cooler lid, or lifejacket.
This will also give you some weight, helping the line reach your victim.
Always throw the line 1-2 meters upstream of a person in moving water to ensure they can reach the line.
*For added strength, braid or double/triple up on the cord.
Want a free 54 item survival gear checklist?
Click here to instantly download this Complete Checklist PDF. No purchase necessary.
For Self-Defense
Defending oneself or your family is a high priority for any serious survivalist.
Here is the top self-defense paracord uses you should take the time to learn.
7. Tripwire
Not only should you protect yourself from nature’s elements but from deadly predators as well.
These predators can be of either the animal or human variety, but both CAN and WILL threaten your safety.
With a tripwire, you can temporarily disorient an intruder, allowing enough time to protect yourself from the threat.
Use the inner threads of your paracord.
These threads are strong but are harder to spot than the exterior color of the outer casing.
Now tie the threads tightly between two trees at shin height.
Ideally, place them in the exact location you anticipate an intruder to travel through.
This needs to be no more than a foot above the ground.
If there are no trees in the general location, use two boulders or use two spikes hammered into the ground.
8. Tripwire Alarm (Primitive)
This is an alternative method to the basic tripwire.
Use this tripwire as a perimeter of your camp to alert you of intruders to protect yourself and your valuable belongings.
This is extremely important during times of rest and minimal visibility environments like night or severe weather.
Because these are the times that you are most vulnerable.
A simple addition to this tripwire is using Sentry Tactical Trip Wire Alarms.
Just add a .22 caliber bullet to these, and when the wire trips, it will make a loud BANG.
Here’s a good video detailing a good tripwire alarm setup:
↓ DIY Perimeter Trip Wire Alarm
9. Restraints/Handcuffs
If you must restrain someone who wants to hurt you or your family, it may be a good idea to tie them up.
When supplies are limited (such as TEOTWAWKI), people’s ethics are tested, and everyone starts fighting for their own survival.
At this time, decisions and actions are for themselves only, causing threats to increase.
Here’s How…
Braid your cord to 1 ½ inch thickness. Create two loops of the same size.
Then overlap the loops and thread each loop into the other. Insert the intruder’s hands or feet and tighten.
↓ How to Tie the Boatswains Handcuffs with Paracord
10. Bore Snake for Firearm
Keeping the barrel of your firearm clean is essential for accurate shooting.
If your gun is exposed to the elements, rain or snow, dropped in the dirt or shot, residue in the barrel can alter a bullet’s trajectory, causing you to miss.
When your food supply and safety depend on your gun working properly, a bore snake made from your paracord is a good solution.
Here’s How…
Cut a piece that is double the length of your firearm.
At one end, tie knots 1-3 inches apart until you have used up two-thirds.
If your firearm has a wide barrel, you’ll need to make double or triple knots.
Feed the blunt end through the barrel.
The knots squeezing through the barrel will pull out any dirt and debris with them.
The key is sizing the knots properly so they don’t slide through easily.
There should be some tight resistance.
↓ Boresnake Alternative
11. Stone Throwing Sling
It’s possible to get trapped in the wilderness longer than anticipated due to weather, illness, or disorientation.
Maybe your survival pack accidentally falls off of a cliff, floats downstream, or is stolen; Stuff Happens.
But if you wore a paracord belt or a survival bracelet, you’ll have enough to fashion a makeshift stone-throwing sling.
It’s an impressive survival device with the flexibility to be used both as a weapon or hunting.
The stone-throwing sling is a solid multipurpose tool for wilderness survival.
All you need is some cordage, a strip of leather or fabric, and a stone.
Here’s How…
Start by cutting your paracord roughly 2 ½ feet long.
Then cut your leather or fabric about 6 inches long and 3 inches wide.
This is used for holding your stone.
Pre-soak your leather, wrap a stone in it, and let it dry.
This will create a pocket for the stone to sit in.
You will need to add a hole on each end of your leather where you will tie your cord.
Grab your cord, and on one of them, tie a bowline knot with a loop roughly the size of your thumb.
Then tie the other end of this piece to one side of the leather you have cut.
With your second precut cord cut, tie it on the opposite side of the leather and then three overhand knots at the end of that line.
Your new stone-throwing sling is now complete, and practice can begin.
Loop around your thumb, rock in the leather, and put the other end of the rope in the palm of your hand.
Here’s a step-by-step video instruction on how to make a survival sling out of your cord.
↓ How to Make a Rock Sling (Weapon)
12. Monkey Fist
Attacks on your camp are highly likely when TEOTWAWKI occurs.
Supplies and resources are limited, and you must be prepared to defend yourself, your interests, and your home.
If firearms are no longer available, you must find alternative options.
With paracord and the knowledge of knots, you can make the perfect weapon.
A monkey fist can be used from a distance creating space between you and a threat and adding additional safety.
As far back as the early 1800s, the Monkey Fist has been used for protection as a weapon.
Once the skill of tying the monkey fist is mastered, this can be a simple device to create.
Here’s How…
You will need three things.
Paracord, a round object of any size, and something sharp to cut with.
When determining how long you want to cut, you need to decide what it will be used for and what round object you will use.
Marbles or small rocks will work to create your decorative piece.
If it is being used as a weapon, a bigger rock or steel ball may be used.
For our purposes, you will need 4-5 feet.
Start by wrapping the cord around two fingers loosely with your fingers spread out, creating empty space between the cords.
Do this four times, then change directions.
Then wrap it another four times, going in the opposite direction creating an X.
Make sure you keep the dead space within that X and your two fingers. Once you have done this, insert the marble.
You will now wrap the marble four more times, going in the only direction around the marble you have not gone.
This time, you wrap between the fingers going around the marble instead of around your fingers like before.
You are now creating the final step of covering the marble before you begin to tighten the cord SLOWLY.
You should have an even amount of wraps from all angles.
For our marble, it is four wraps in all three directions.
Slowly start tightening the cord. Continue this evenly until you can no longer tighten the cord.
Use the excess cord to attach your monkey fist to your predetermined object.
This will take patience and possibly multiple attempts.
Remember, practice makes perfect.
Here’s a full video tutorial on how to make a giant monkey fist using a pool ball.
↓ GIANT GORILLA Monkey Fist Tutorial!

Hunter & Gathering
We all know food is essential for long-term survival.
Paracord can help assist in this challenging wilderness endeavor.
Here are a few of the best hunting and gathering uses.
13. Fishing Net
A quick and efficient way to help catch fish is by utilizing a fishing net.
A fishnet increases your odds of scooping and grabbing fish before they shake line.
Here’s How…
Cut your cord the length you want your net to be; about 5-15 feet works well.
Separate the inner strands from the outer sheath.
Place the outer sheath horizontally and the inner threads vertically.
Attach them to the corners, where the sheath and the inner threads meet.
Tie the inner strands to the sheath, 2 inches apart on both sides.
Do the same thing in the opposite direction.
This time, create a quick knot when you overlap another strand until you are done.
↓ Survival How To Make A Fishing Net
14. Fishing Line
When you find yourself in the wilderness, out of prepackaged food, and hungry, you must resort to other sources of calories.
If you’re near a lake, river, or stream, you only need some fishing line, bait, skill, and a boatload of patience.
Here’s How…
Remove the inner threads.
Tie the ends of the threads together using a bend knot to create your desired length. Use a stick, source a soda can, and use the tab to make a hook.
Toss your line out and start drowning some worms.
Toss your line out and hope for the best.
↓ Can You Use A Strand Of Paracord As Fishing Line?
Want a free 54 item survival gear checklist?
Click here to instantly download this Complete Checklist PDF. No purchase necessary.15 . Trotline for Fishing
Fishing is often extremely time-consuming, with little reward.
For example:
Fishing with a stick and line requires you to sit and watch the line with the real possibility of getting skunked.
However, a trotline can increase the odds of catching more fish over a period of time and doesn’t require your full attention.
A simple trotline left overnight with multiple hooks can be rewarding with minimal energy exerted and less time wasted.
Here’s How…
Use the same method as you would create the fishing line.
Then tie small drop lines, “trots” with hooks attached, 2-3 feet apart. Tie the line to two points over the water.
↓ How to Make a Paracord Trotline
16. Fish Stringer
Maybe you found a honey hole where the fish are hitting left and right, but you need to stock up to ensure you save some of the food for an extended period of time.
You need something to carry all those fish back to camp, or maybe you want to keep them alive in the water while you haul them in.
This is when you need a fish stringer.
With some paracord, you can create a makeshift fish stringer to hold all your fish.
Here’s How…
Based on the amount of cordage you have, you may want to use the outer sheath instead of the entire cord.
Tie one end of the sheath to a rock, then make a slip knot through the first fish’s gills.
Then, slide them on, stopping when they hit the first fish.
↓ A Closer Look At Paracord Fishing Stringers
17. Hanging Food/Game
When camping in the wilderness, there will be other hungry wildlife around.
Or maybe you’ve just dropped a deer, and nightfall is approaching quickly.
Either way, your primary concern is keeping hungry predators from coming in and stealing your food.
Your paracord’s strength and versatility will help you get your animal up off the ground.
This will help to keep your game out of the reach of thieving animals and maybe even out of sight of thieving people.
Here’s How…
Scout out where you will want to store your food and determine the length.
The length of the cord will need to be at least twice as long as the height of the sturdy limb.
Throw the cord over the limb and tie your food to it.
Pull the other end until the food is safe in the trees and secure the rope to another limb or tree’s trunk.
This is the same method used for hanging game for a butcher.
The difference is how you tie the game.
A strong limb must be put between the hind legs to ensure the game cools properly.
Then tie your slip knot around each leg end to hold the game head down for dressing.
*For added strength, braid or double/triple up on the cord.
↓ Quick, Secure Knots for Hanging a Bear Bag
18. Snare/Trap
Another low-energy, time-saving survival technique for gathering food is setting out animal snares.
Snares are best used in high numbers.
Using multiples will increase your odds of catching your next meal while not excreting any extra energy.
Snares are typically set out in the late afternoon in active areas such as game trails, feeding areas, or water holes.
Then they do all the work overnight while you sleep and replenish your energy.
Note: Often times it will take a couple of days to snare wild game due to the residual scent you leave behind.
After a few days, that scent will dissipate, improving your odds of snagging a meal.
Here’s How…
You only need your paracord, a rock, and a few sticks to create one of these.
Tie a slipknot using the inner strands of the cord. These must be set small enough for your targeted animal’s neck.
Attach the slipknot to the hook and the hook to the leader line.
You can also use your inner strands as the leader line attached to the tree sapling used for tension.
↓ Easy Knot (Basic Poachers Snare)

<h2>How To Use Paracord When Traveling
Traveling and survival go hand in hand. Often, staying put is the worst thing you can do to survive, depending on the specific situation.
So if you’ve determined that travel is necessary, these uses may come in handy.
19. Snow Shoes
We all know the weather is unpredictable.
You may someday find yourself in terrible weather without appropriate gear.
For example:
Hiking in deep snow is difficult, especially without proper footwear.
With each step, you’ll sink deep into the snow, wasting tons of energy.
This is called post-holing and slow-going and brutal.
↓ Postholing Example
To make moving across deep snow easier and preserve precious energy, snowshoes are the answer.
Here’s How…
First, gather four branches at least 4 inches longer than your foot and 10 branches that are 4 inches wider than your foot.
Lay the four long branches parallel to each other on each side of your foot; this is the outer framework.
Step out of the long branches and place five small branches connecting each long parallel branch.
Place one connecting the top, the bottom, across the center, top half, and bottom half.
Tie the intersecting branches together with constrictor knots.
Weave some around each of the shoe foundations in a crisscross pattern.
Tie loops on the top that will fit your foot snuggly.
Now, you’re all set for the snow to come in.
↓ Easy Survival Snowshoes
20. Tether Yourself to Your Bug Out Bag
In the wilderness or TEOTWAWKI, you’ll need to ensure that your bug-out bag can’t be taken from you by accident or force.
So by tethering yourself to your bug-out bag, you limit the chances of theft.
In survival situations, ethics are tested, and valuable survival gear is an easy target.
Here’s How…
The type of pack you have will determine how and where you tie your pack to yourself, but a basic figure-eight knot should do the trick.
Simple but effective.
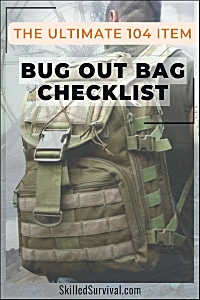
Want a free 104 item bug out bag checklist?
Click here to instantly download this Complete Checklist PDF. No purchase necessary.21. Trail Markers
You increase your odds of getting lost when traveling outside of the safety of your campsite.
Even if you have a great sense of direction, a pop-up storm or accident can happen, increasing the chances of getting lost or disorientated.
Here’s How…
Use small strips of paracord and tie them to branches at eye level.
This will help you retrace your steps and return safely back to camp.
You can then use these smaller bits for zipper pulls or as tinder for fire starting.
↓ Cord as Trail Markers
22. Across Stream Guide
Don’t let a stream detract you from a path you must follow.
Use some paracord to assist in crossing a high or fast-moving stream safely.
Tie the cord around the first person crossing the river using a bowline.
If you have enough cord to make it across easily, tie the other end to a sturdy tree.
Once the first person makes it across, they untie it from themselves and tie it to a tree on the other side.
Then the second person untied it from the tree and tied it around themselves.
This method keeps from putting both people at risk at the same time.
However, if there is not enough cord to reach across, the next best option is to tie the cord to each other and slowly make your way across together.
If one falls, hopefully, the other person can stay up and “catch them.”
However, it may be risky as the first person falling may be too much to handle, and both parties are swept away.
*For strength, braid or double/triple up on the cord.
Not much changes with a single-person scenario except to first tie to the tree before crossing the river.
As a single-person crossing, you will have to leave your tied-off rope behind, but it may be worth it if the stream is extremely dangerous to cross without it.
23. Create a raft
Imagine that heavy rains have fallen over the past two days.
You’ve been in the backcountry and are now working your way back to your vehicle.
Perhaps the stream you crossed a few days earlier was ankle-deep but is now well above wading depth.
Temperatures are plummeting towards freezing.
There is no way you can risk staying out in the weather overnight. So it’s time to make a raft.
Using the paracord you have on you, a few logs lying on the shore, and a couple of survival knots are all you need.
With these wilderness items, you can create the raft needed to cross this river and get you back on the path home.
Here’s How…
Find five wooden logs about one foot in diameter.
Find four thick branches strong enough to secure the logs together.
These branches will also need to be about 8 inches longer than the width of the side of the log.
Place the logs side-by-side, and a foot from the top and bottom of the logs, sandwich the logs between two of the branches.
*For added strength, braid or double/triple up on the cord.
↓ How To Build A Raft With A Survival Bracelet
24. Hauling (Dragging Gear, Timber Hitch)
You are out snowmobiling when the snowmobile breaks down.
Let’s say you’re a few miles from camp and forced to hike back before sundown.
The problem is you have essential gear on your snowmobile that you can’t leave behind.
The cord in your pocket comes to mind.
Once again, you can haul or drag your gear back to camp before dark with a few simple, efficient knots and braids to strengthen the rope.
The proper cord strength is the key to hauling gear, supplies, and objects.
Increase the strength by braiding.
Use the appropriate knot for the object you will be hauling, usually using a timber hitch for heavy hauling tasks.
↓ The Cheapest, Lightest, Quietest, and Easiest DIY Hunting Gear Hang
25. Hold More Survival Gear
Your friend broke his leg, and you’ve splinted it with paracord, but how will he haul his gear out to safety?
He’s not; you are.
In this situation, you can carry all of the extra gear back.
You need to adjust your gear load to be able to carry more than you normally do.
Using a sequence of knots, smart braiding techniques, and secure wrapping of paracord, anything can be secured to an object to hold more than originally designed.

Everyday Survival Paracord Uses
Here are the “other” survival uses that didn’t fit into the previous categories.
However, they’re still extremely useful to learn.
26. Secure A Tent / Tarp / Hammock
You only need a lightweight tarp and some cord to create a simple shelter.
Thread the paracord through the eyelets of the tarp.
Secure it between two tree-like structures using a bowline knot.
Or drape a tarp over a secured taught line.
Or the tarp can be tied end to end between two trees to make a simple hammock.
Remember, for extra strength, you can always double up your line or braid it.
↓ Paracord Hammock
27. Bow Drill
The night is fast upon you, and it’s both cold and damp.
You’ve lost your steel and flint; you need an effective fire-making method.
Bow drilling, with practice, can save you from risky cold-related illnesses.
Cut notches in the branch about an inch from each of the ends.
Use slip knots to attach the cord to the bow.
The notches created will be perfect for keeping it secure while you use the bow.
↓ Double Rope Bow Drill Technique
28. Repair Torn Clothing
Imagine you’re out on a long hike when you slip and fall.
You begin to slide down the trail until you abruptly stop.
Fortunately, you’re okay, but your waterproof pants have a six-inch tear.
That tear is letting moisture in.
The handy paracord in your pack can easily be used to sew that tear up.
Use the thread from inside the cord.
Thread your makeshift needle and whip stitch shut the tear.
↓ How To Turn Paracord Into Emergency Sewing Thread
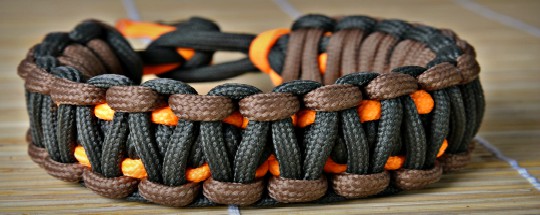
29. Emergency Belt/Bracelet
A belt or bracelet braided together is a lightweight emergency kit ready at a moment’s notice.
Use a cobra knot to create the perfect length belt or bracelet.
Just slip the paracord through the end of a buckle before knotting.
Making a bracelet is one of the most popular survival projects.
↓ Easy Paracord Bracelet Kit
30. Make A Strong Rope
Any time you’re out enjoying the great outdoors, you should always try to pack light.
No one wants to pack lots of heavy rope.
Paracord is both lightweight and strong; plus, it takes up much less space than traditional rope.
It can act as a heavy rope when combined with braiding techniques.
Use the cobra stitch or other series of knots to create one extremely strong rope out of several strands.
↓ Make All The Rope You Could Ever Want
31. Rope Ladder
There are times you may find yourself in need of some extra elevation.
In these cases, a rope ladder can solve the problem.
Maybe you want to snag a few eggs out of a nest or shimmy up a tree to hunt from or cross a canyon or crevasse.
Get two lengths of paracord, each one and a half times the height you want the ladder.
Find sturdy branches that are 8-12 in long for the rungs.
Lay out both pieces parallel to each other.
They should be close enough to overlap the branches two inches apart.
Lay the rungs out at the desired distance apart from each other.
Use constrictor knots to tie the paracord to each of the rungs.
If possible, tie the top of the ladder to the desired location using a bowline knot.
*For strength, braid or double/triple up on the cord.
↓ The Marlin Spike Hitch Rope Ladder
32. Pet Collar / Leash
Maybe you rushed out the door for your weekly hike with a man’s best friend only to arrive at the trailhead without a leash.
But you should have some paracord!
For single strands, be careful not to choke your pet due to how thin the cord is.
A braided cord is much safer to use as a leash or collar.
↓ Make a Safety 2 Rings Design Paracord Dog Collar
33. Shoelaces /Replace Broken Drawstrings
We’ve all experienced a broken shoelace.
But let’s say you’re four days into a two-week hunting trip.
Paracord to the rescue!
Simply remove your broken lace and measure the length of your cord.
Next, use a lighter to melt the ends to prevent fraying.
Replace paracord with shoelaces.
↓ Fire Laces Review (I Started A Fire In My Office!)

34. Hang Tools From Belt
When in survival mode, you’ll want to multitask.
A tool belt is a great option for hands-free safety and security.
Everyday tasks like gathering food and defending yourself often require several tools.
With a paracord belt, you can use one tool while having the others in arm’s reach.
Cut pieces about the diameter of your wrist.
Wrap the piece around your belt loop and tie it with a simple knot.
↓ The “Open Loop” Cobra Weave Tool / Survival Belt
35. Dental Floss
Maybe you’re in the wilderness and chomping on some homemade jerky.
The jerky decides to find a happy home between the two furthest back molars.
What would you be willing to pay for a bit of dental floss right about now?
Use the internal strands to maintain good dental hygiene.
Long-term survival without a dentist can turn a simple cavity into a serious dental complication.
↓ Paracord as Dental Floss? – Unraveled #1
Want a free 54 item survival gear checklist?
Click here to instantly download this Complete Checklist PDF. No purchase necessary.↓ 101 Uses of Paracord – Survival & Homesteading
Using Paracord Only Works If You Practice
As always, practice before you are in a situation where your survival is at risk.
Time practiced is never wasted when prepping for emergencies.
Paracord allows you to lessen your total pack weight when outdoors.
Less pack weight increases your ability to escape dangerous situations and limits your need for bulkier supplies that may slow you down.
If there’s one thing you can do today to make you much safer tomorrow, it’s to get some survival cord and add it to your everyday carry supplies.
Why Trust Skilled Survival...
Go here now to review a full breakdown of:
- Who We Are
- Our Credentials
- Our Mission
- & Product Recommendations...
Here are a few highlights of our teams credentials & certifications:
- Certified Member of a Mountain Search & Rescue Organization
- Plant Emergency & Safety Leader for a Major Food Manufacturer
- Member of the 10TH Mountain Division Hut Association
- Certifications: Avalanche 1, WFR, CPR
- Official Gear Tester for Numerous Outdoor Gear Companies
- Countless Multiday Backpacking trips into Remote Wilderness
- Bachelor's Degree In Mechanical Engineering
- Bachelor's Degree In Civil Engineering
- Bachelor's Degree In Biomedical Engineering
"It takes 20 years to build a reputation and five minutes to ruin it." - Warren Buffett
We're fully aware that trust is NOT something you GET but is EARNED.
And we'll continue to earn YOUR trust through our forthright and honest approach with each new Blog Post, Guide & Product we create...
Prepare, Adapt & Overcome,

P.s. Do You Live In A 'Danger Zone' County?

Find out now using my Danger Zone County List & Special Report it’s absolutely FREE.
In minutes you’ll know EXACTLY where you stand and if you should be worried or not..
So click here to get my FREE Danger Zone County List & Report…
Recommended Reading
Survival Pack: How To Build One NOW (before SHTF)
Survival pack list From Scratch. Packs That Will Make You A Hero To Your Family. Plus, Some Of Th Best Packs You Can Buy
Best Survival Packing List To Plan For An Evacuation
Everyone needs a survival packing list to organize their escape. That way you won't regret leaving something critical behind.
13 Best Wild Edibles ANYONE Can Find Nearly Everywhere…
Discover the best wild edible plants you can find and eat nearly anywere. Knowing and identifying these wild edibles could save your life.
How To Make Catfish Bait: My Grandpa’s Ultimate Recipe
I want to share with you what I consider the best catfish bait recipe. Here's how to make stink bait that will get the catfish to bite.
Paracord Projects: 17 Survival Devices You Can Make
I share the best paracord projects that are both fun and useful. By doing these crafts you'll always have lifesaving cordage on hand.
Best Survival Skills Every Adventurer Should Learn
The best survival skills will keep you alive even in extreme conditions. 1. Water 2. Shelters 3. Fire 4. Navigation 5. Signaling 6. Medical 7. Foraging...